While micromovement of Slidemap is critical it is not even the most important part, that designation remains the optics. Slidemap itself is an imaging platform and thus needs to be able to capture high resolution and high magnification images. While this may sound complicated there really isn’t much besides these few basic things.
- Objective Lens
- Camera
- Light source
In a typical microscope, you have all these components plus sometimes some mirrors and other lenses to reflect and show the image to your eye as if it were a normal picture. With a camera, on the other hand, it’s a little bit different. Most cameras come with a lense built-in but underneath that lense is a CCD which actually captures the light. Therefore those lenses and mirrors can theoretically be removed and replaced with a camera with no lens mounted directly above an objective lens and encased in a tube. The tube around is critical because it will prevent stray light from entering or leaving and will keep the image clear and not foggy. Next is the objective lens.
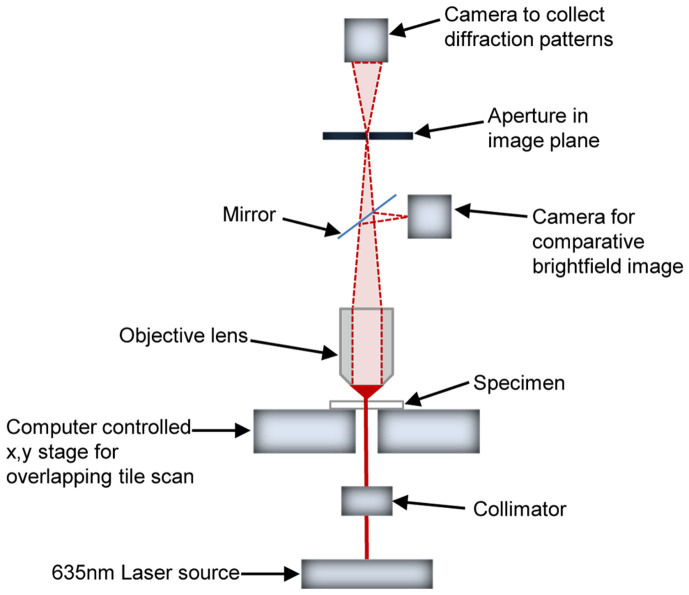
A typical objective lens magnifies then sends light out at an angle and it then goes through another lens to invert it and project it into the eye. However, the lense is missing in our design meaning depending at what height we put the CCD it will change how much the image is actually magnified. Put it to close and we may not see enough of the image, but it too far and we may go from 40x to 10x. To get around this problem I used an infinity lens which projects the light straight up rather than at an angle. So no matter what height the camera is mounted at it will still get the same image. I am not an optics expert so I am not sure if there are any downsides to using an infinity lense but I will find out through trial and error.
The last thing is the light source which varies on the type of microscope but in this case, I am just doing brightfield microscopy so need bright white light. For a typical microscope the slide and XY table is moving not the microscope. In Slidemaps design to allow it to be more practical for other imaging applications, I have designed the microscope to be what actually moved. Now this proves challenging when trying to light up the specimen because In a normal microscope light and microscope are stationary and perfectly in line with each other. Slidemap though because the microscope is moving I need the light to also move with the microscope, this left me with a few options.
- Top Lighting
- Bottom Lighting with an arm for the light
- Diffused Light
Top lighting is typically used in macroscopic, not microscopic applications and in applications where the object you’re looking at is not translucent. For example when soldering tiny connectors onto PCB people typically use a stereo top-lit microscope to get a larger view of the PCB. While this is great at lower magnification I don’t know if it works with anything higher. From what I have seen as you move up in magnification less and less light actually makes it into the objective and thus into the camera making the image darker as you increase magnification. In a normal microscope, this is okay because you can change the spot size of the light on the slide by moving the condenser lens up and down. With a top light however you have no way of concentrating the light on a certain point and ensuring that it all reflects back to the lens. Meaning if I want to potentially use a top light I would need a super bright light so that even at 40x the image is bright enough.
Option two is bottom lighting with an arm for the light. This might work but has a few downsides. First I don’t know how stable it will actually be because I am not using solid metal pieces like normal microscopes do. It also limits motion and the size of the object I can view. Let’s say my object is a three inches wide but my arm is only 1.5 inches long. I cant easily view the entire object and thus would increase the arm size making it less stable and increase the chances it hits something when trying to move it.
The third option which I tried in my last design is diffused light. This is basically having a light underneath the objective lens and specimen that is in a container that diffuses the light across an area. This has a similar problem to top lighting in that you cant focus the light on a single point. The challenge with this is finding a light that is bright enough so every point on the surface area of the diffuser film is bright enough for 40x magnification.
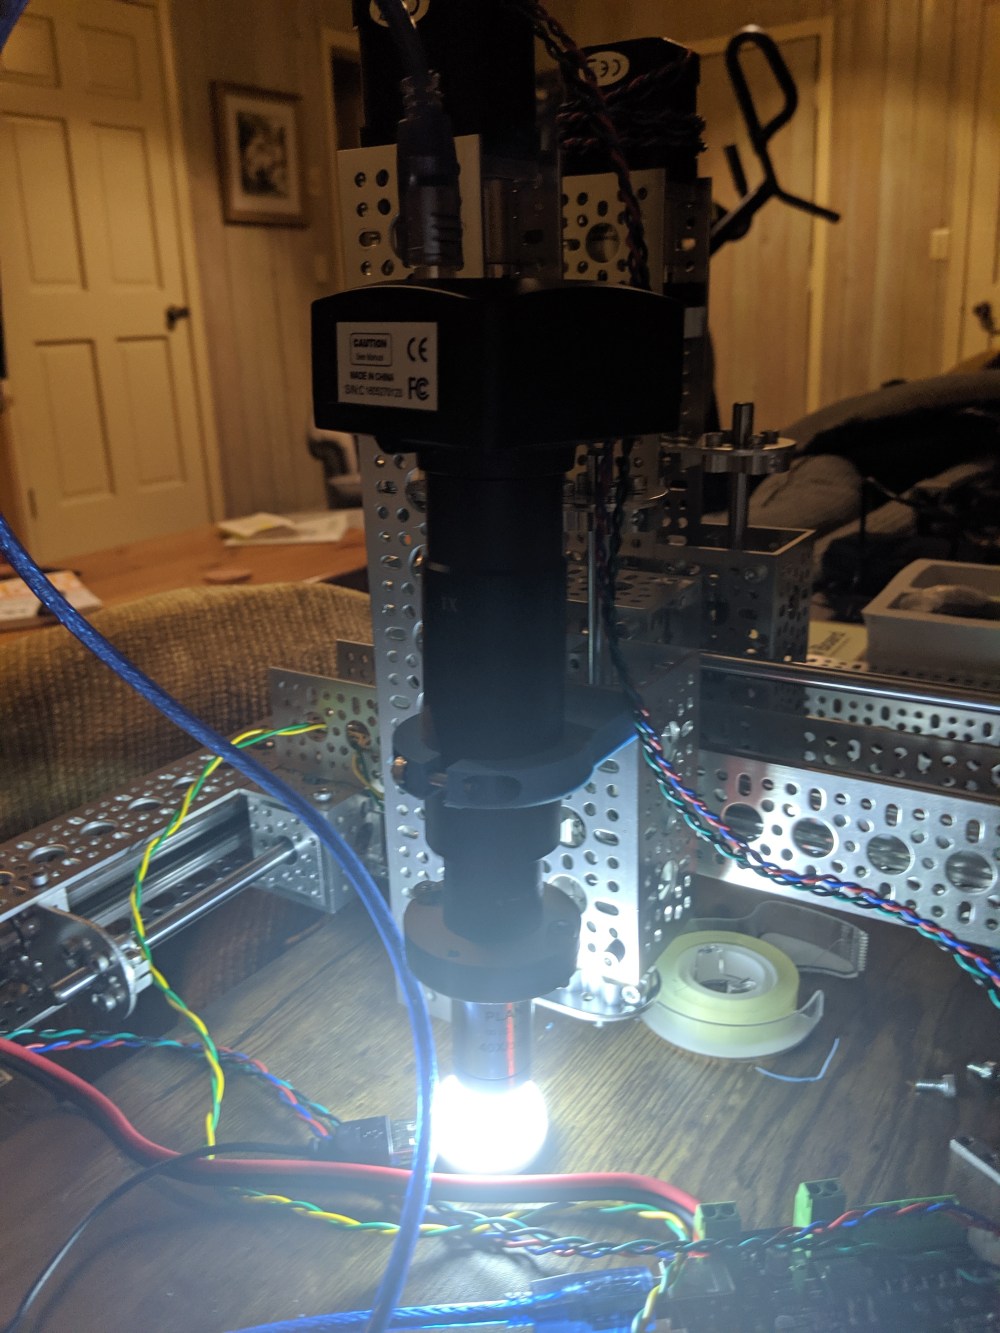
I am going to be experimenting using a 4k microscope camera from OMAX that screws into a metal tube which I designed an objective lens mount for at the bottom. I am using a fairly cheap bright light source below the objective that I am placing the slide on. I got a few images from this and found them to be acceptable bit blurry. Alright alright, any optics expert would probably cry at this design but the ultimate purpose of Slidemap is to drive down the cost of traditional slide scanner and to do that short cuts sometimes have to be made and things that aren’t completely necessary also have to be cut. I also found that with the OMAX camera there is a special python API for it which is great because I will have a way of controlling it once I integrate it with the movement code. It also has an exposure setting which decreases the frame right if exposure is increased but it also increases the brightness of the image because it collects more light. So if light really is an issue I can increase the exposure time to get a brighter image but that will come at the cost of framerate and thus max speed that I can move Slidemap and scan a slide.
I am planning on talking to some experts at Max Planck about imaging and optics and see if I can get any recommendations because I am kind of in uncharted waters and haven’t really done much work with optics.
